Where do I start? My firstborn is graduating…(hold on a sec while I suck back a tear, and ask the question why I have that sick feeling in my stomach like someone punched me?)
As a designer, and an over-the-top party-planning mom, I’ve been thinking about her party and these announcements for more than a year: adding to my Pinterest boards, jotting down notes in my journal and buying things as I see them for the party.

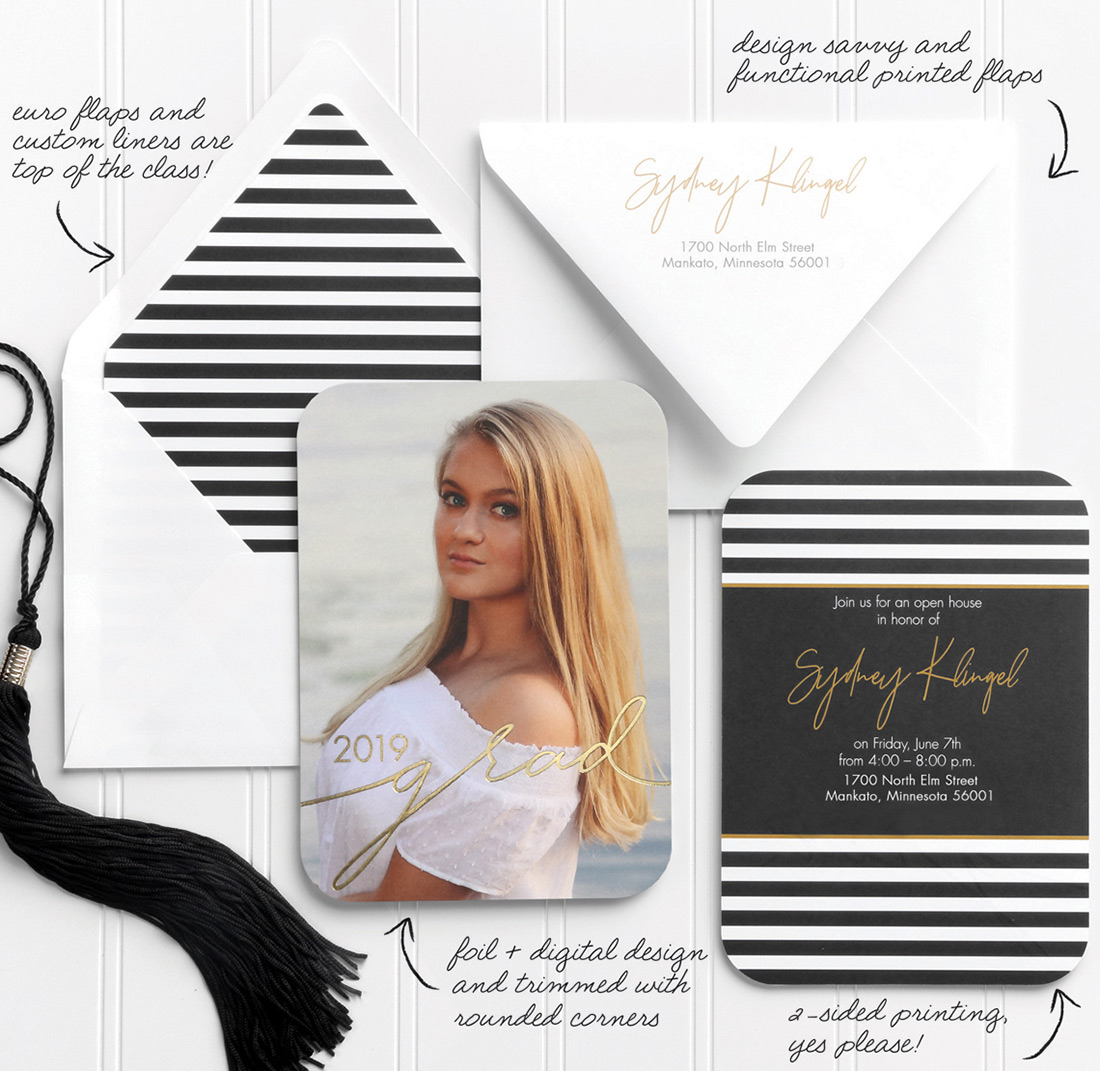
Her party colors are black and white (stripes) with yellow and gold accents, which are not her school colors but the colors she wanted, which is absolutely cool (p.s. kids, pick any color you want, it’s YOUR party.) So with the help of my best friend, who is also a fabulous designer, we created a custom graduation ensemble for her.
Foil stamping is my favorite process so we paired it with digital print on the front of these A7 flat cards from TOG.ink to create amazing graduation announcements. Did you know TOG.ink automatically offers 2-sided printing on digital flat cards? So on the back we put party info, black and white stripes and I finished it off with rounded corners. I love trim options because unique trim stands out in a sea of graduation party invitations and announcements. Check out Using Templates to Set Up Your Art with Die Cuts to learn more about that.
My absolute favorite thing in this ensemble is the new euro flap envelopes with striped custom liner. They tied the whole look together! We printed the envelope flaps with her name and address, which was a big time saver and it’s a WOW factor when friends and family see it in the mailbox.
For paper goodies, I created napkin art with Fun Facts about her (got the idea from a coworker so I can’t take the credit) and for favors. I designed the art for black treat bags printed in white foil, which we will put next to a popcorn bar. Her favorite snack is popcorn, so only fitting we have it at the party.
Placing my order on TOG.ink was a breeze. The templates that TOG.ink provides were helpful for correctly setting up the artwork, which made uploading simple. Overall, I’m pretty excited to send these babies out and I can’t wait for the party!
Stop back in early June for part 2 of this post with photos from the actual celebration.
Leave a Reply