What’s up, designers! This is Josh coming at you with some basic art setup tips. I’m doing a short series on using TOG.ink templates, which I highly recommend no matter how confident you are in your art setup. The template is a super simple tool that helps ensure an error-free finished product. We all love error free!
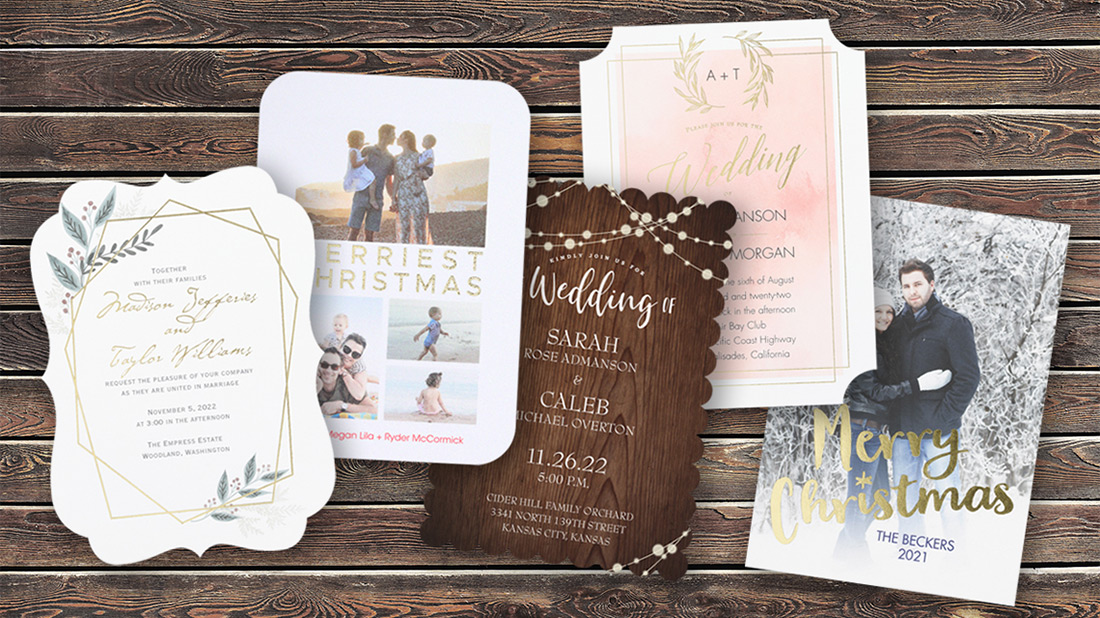
So you’ve chosen the product you want and now you’re choosing from the several die cuts available (learn more about die cutting here). You can find templates for each card size on each product’s detail page.
How to use templates to set up your art with die cuts.
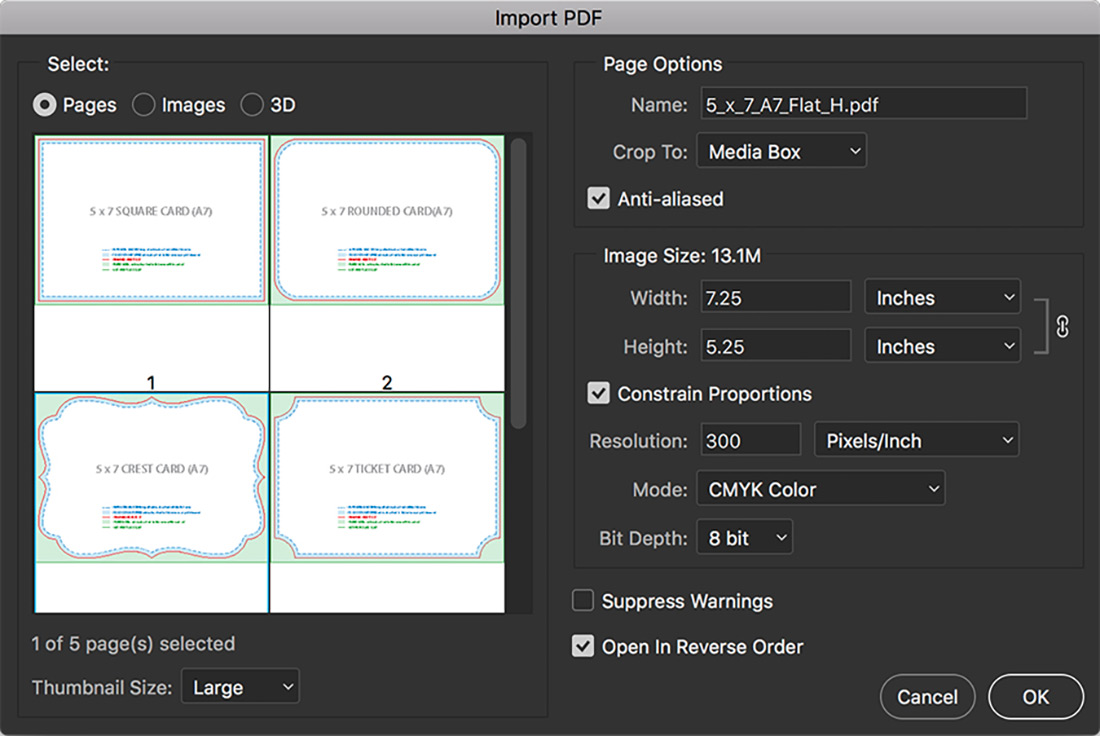
Step 1. Open the template from TOG.ink that matches the size and layout of the card you are designing for. This example will be using a 5″ x 7″ flat horizontal card. The PDF template will prompt you to select which die cut (a.k.a. trim option) you would like to use. Select and open whichever design you would like.

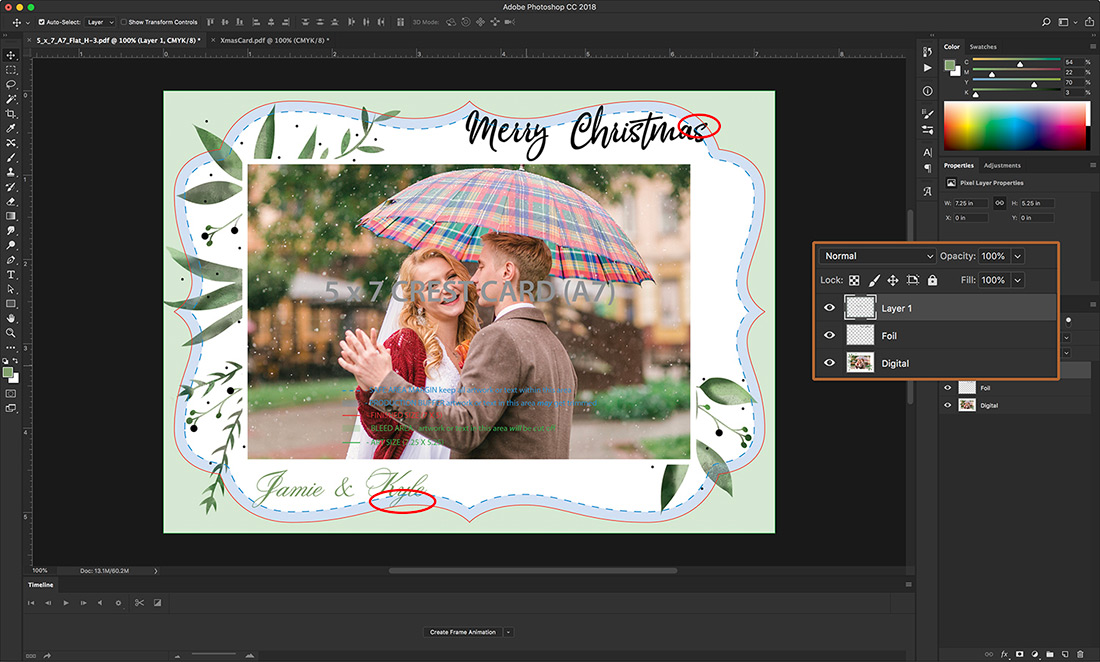
Step 2. After the template is open, paste your design file below the die layer. Now look at where the die will be trimming the paper and be sure all of your art is within the die lines.
In this example, it might be ok to cut off a small portion of the leaves depending on the designer’s preference. However, the words on the top and bottom are within the “buffer” zone, which means they are at risk of being trimmed because die cutting includes a slight variance with every cut.

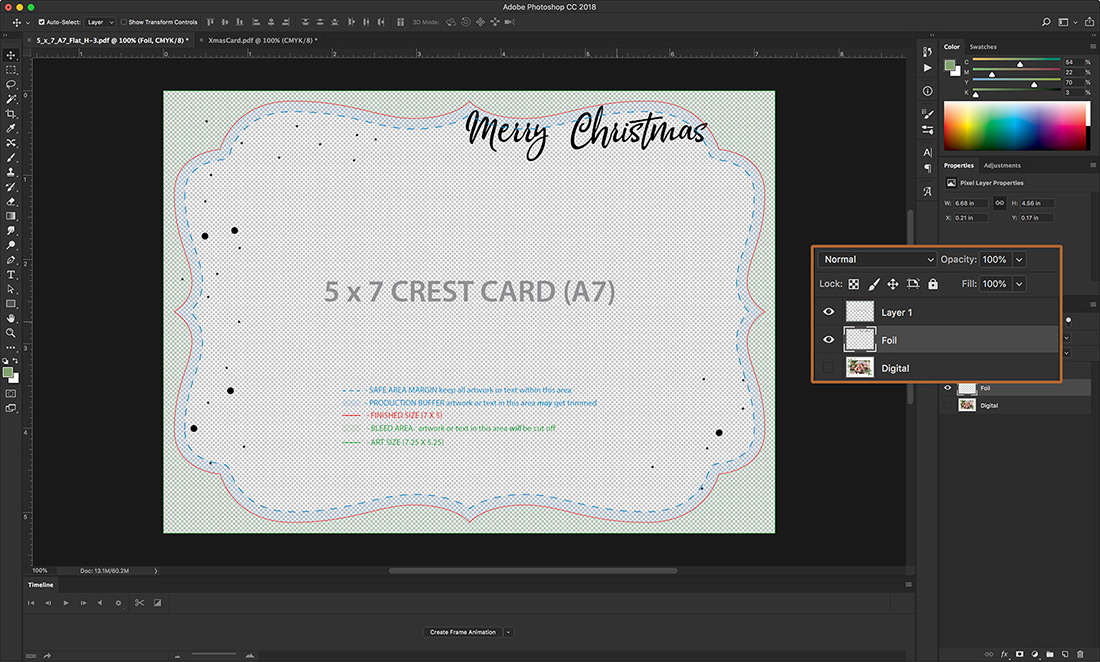
Step 3. If the art file includes multiple print processes, view how each layer/print process looks in the chosen die. This can be helpful to determine if the work to change your art is worth the effort to keep your first die cut shape. In this example, a different die should be selected to ensure the wording remains.

Step 4. Repeat steps 1 and 2 to view other die cut options. As you can see here, the ticket die cut allows all of the text to remain inside the safe zone, and the only art that will be trimmed is the leaves.

If you have not yet designed your art but know you are going to want a die cut, you can start with the die template at the beginning of the design process. Feel free to experiment with other die cuts to see how they work with your art. You’ll find that each trim option lends a different look and feel.
Leave a Reply