Are you designing a stationery piece with a border? If so, we’ve got some great tips for you to ensure the best print quality. You may notice when you print foil or letterpress borders, there is slight movement from piece to piece. This is standard in the industry but the “bouncing” issues (a.k.a. print press tolerance) can compound when combining processes. The good news is you can design around these slight differences and create a design that both you and your TOG.ink print expert are proud of!
Below we will review the various print options available and illustrate the possible outcomes so you can have well-informed expectations for your finished piece.
DIGITAL PRINTING ONLY
This is the simplest piece for TOG.ink to create when it comes to borders because it only has one process before being cut down to its finished size. There is a slight 1/32″ movement from the paper feed, and a 1/16″ movement comes from the final cut. Digital pieces are printed with one of our multiple 7000 series HP Indigos. See the Digital Print video on our Digital Print Processes page to see the press in action.
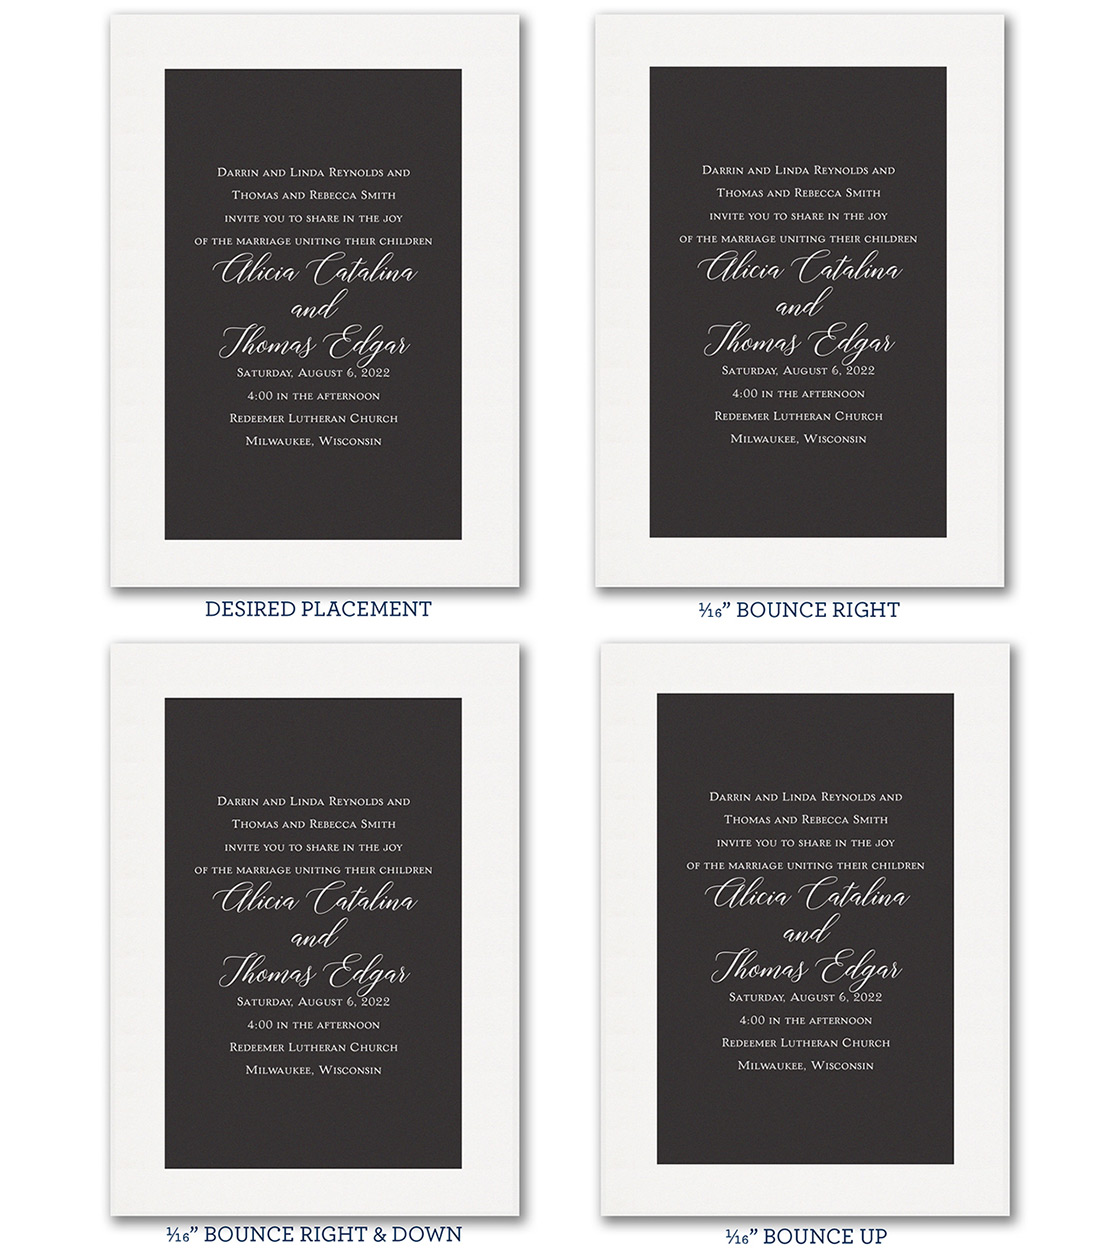
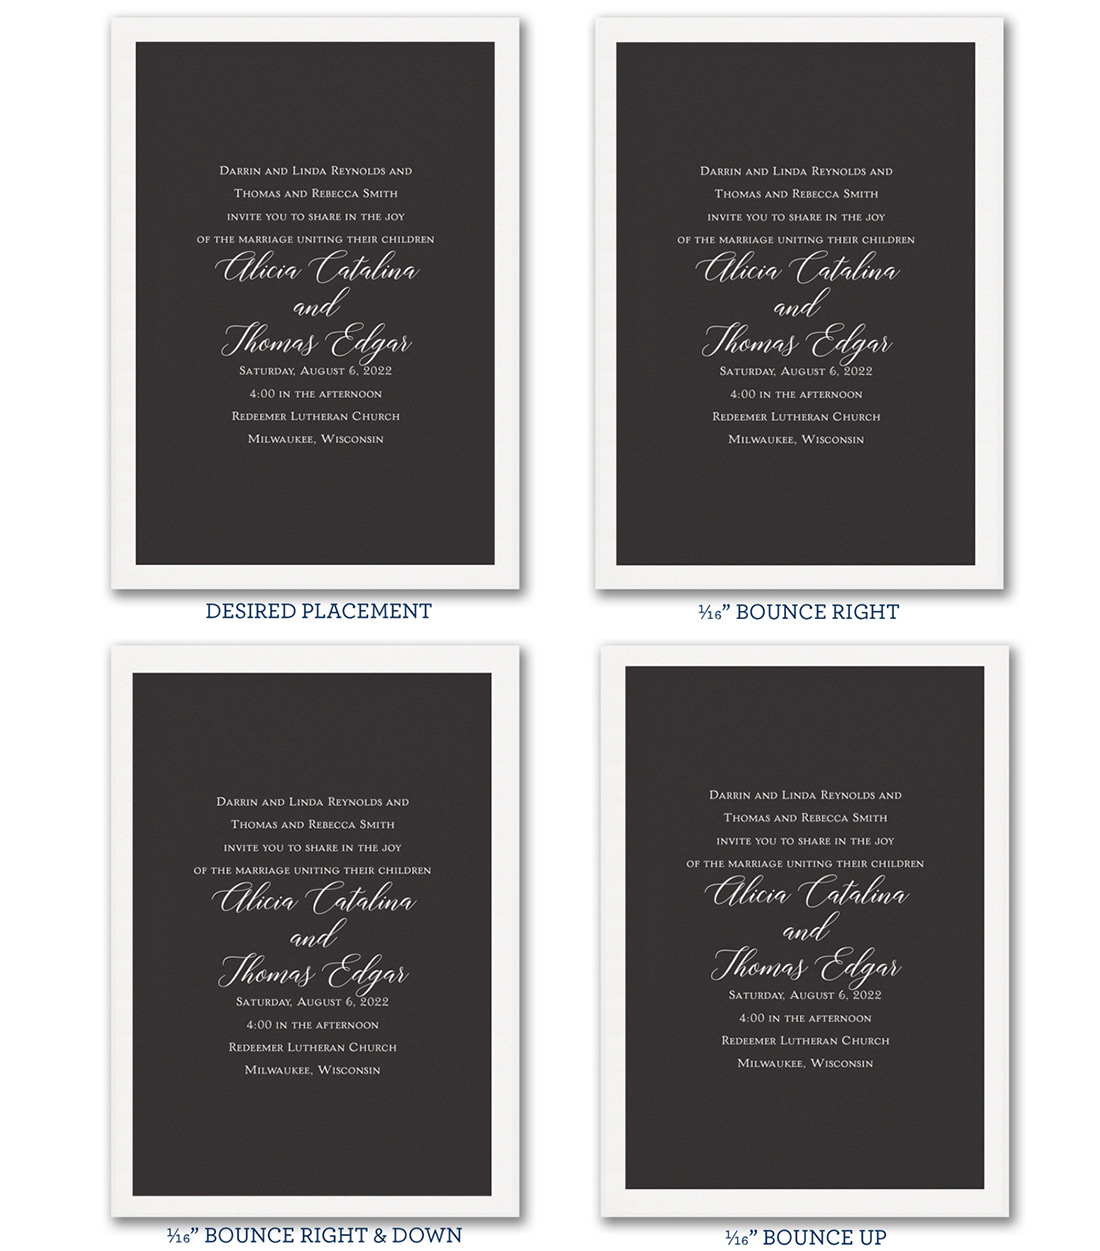
The wider the border or margin, the less you will notice bouncing.
Below is a black and white invite that shows a wide white border of nearly 1 3/4” on all sides. Moving the black image around 1/16” up, down, right, and left will allow you to see what could happen to the finished product.
In contrast, below is the same invite with a 1/2” margin.
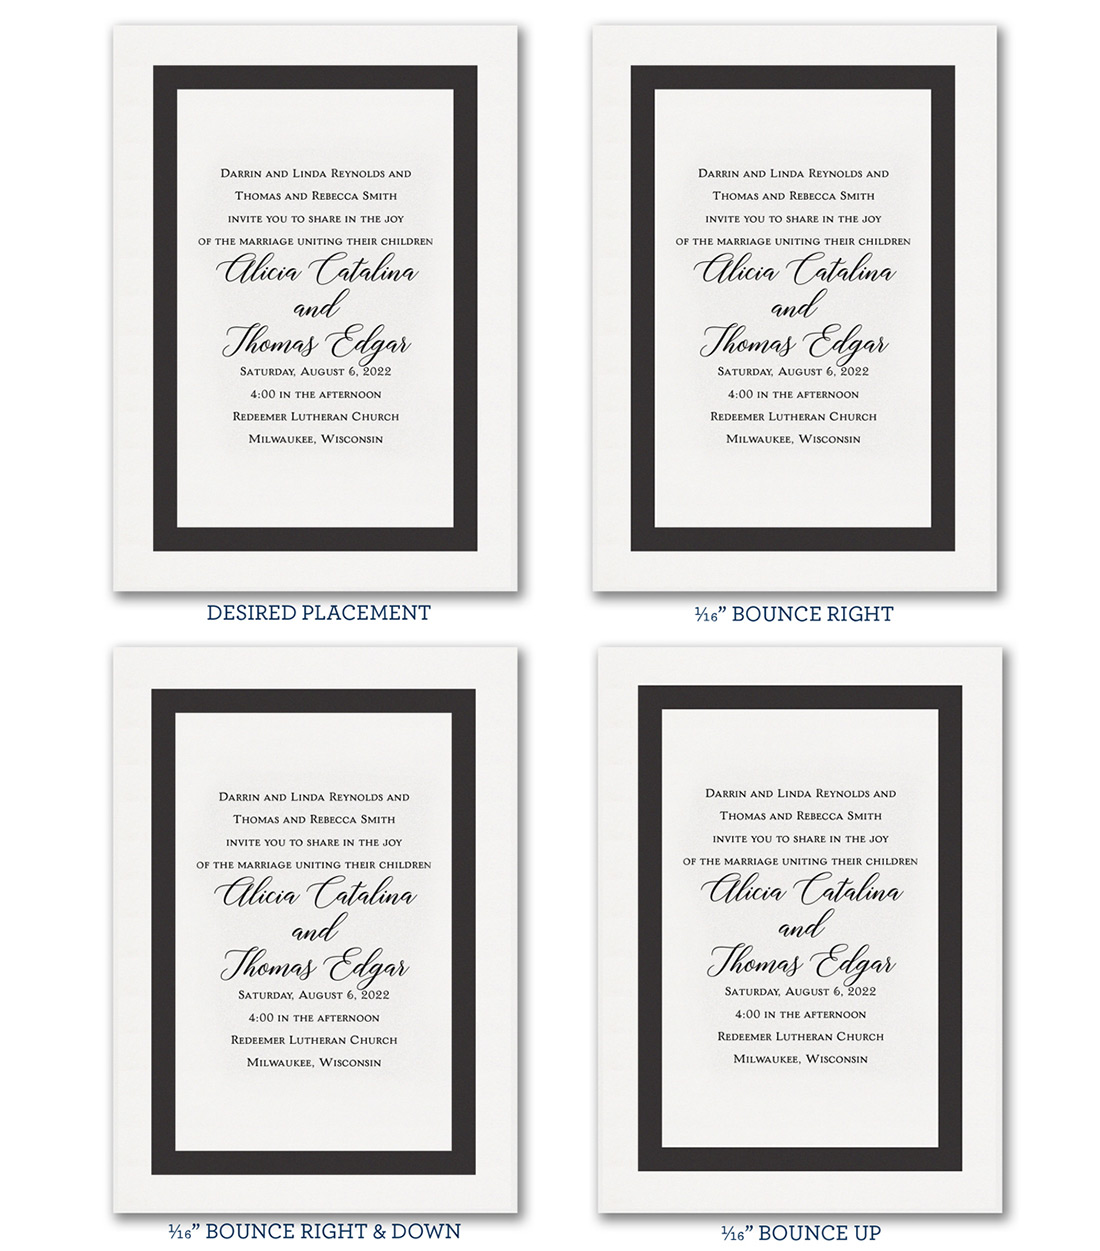
THE SAME HOLDS TRUE WHEN PRINTING BORDER LINES
Again with the same layout, first with a thicker border of 3/4” and 1 1/4” of white space from the trim edge.
Now with a thinner border of 1/8” and 1/2” of white space from the trim edge.
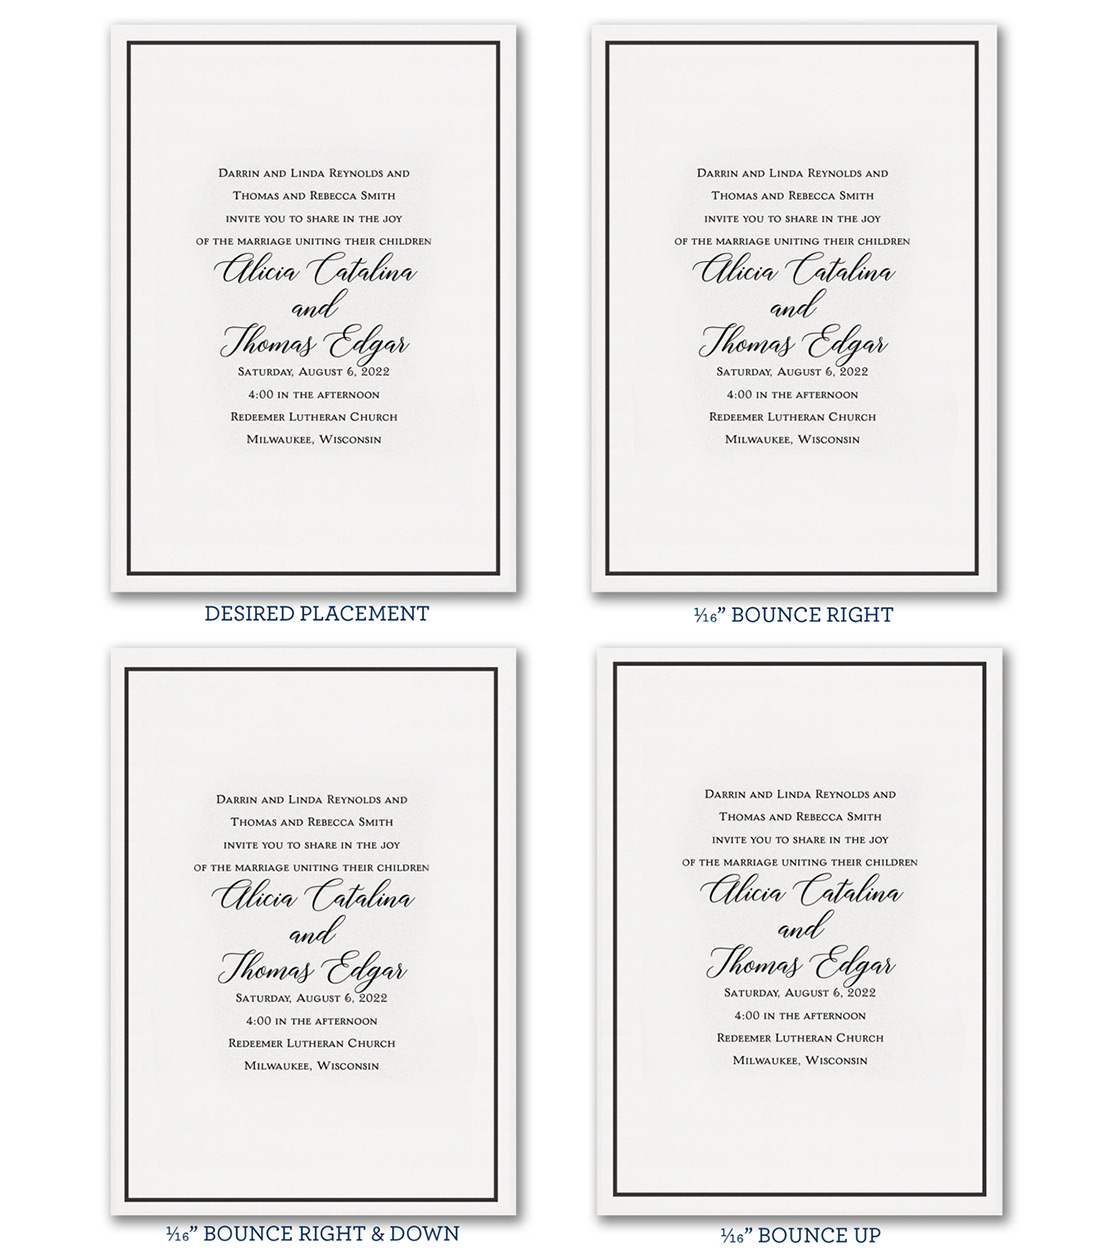
After looking at these images, it may not seem all that noticeable. But remember, digital only borders give you the best chance of a successful end product with minimal bounce due to the new technology of the HP Indigos and only one additional process (the final cut).
FOIL PRINTING ONLY
In order to get a traditional hot stamp look, you need to use traditional methods. Foil stamping is an old process on a machine that got its start nearly 100 years ago, the Original Heidelberg Windmill Press. Each piece is stamped one at a time. It is picked up by an arm with a “windmill” motion before it is placed between the die/foil and plate to make the impression. See the Foil Stamping video on our Foil Print Processes page to see the press in action. Naturally, there is more bounce from one piece to the next. Not to mention that after the piece gets stamped, it still needs to be cut to its final size, which we learned from above has a possibility of a 1/16” bounce.
In these examples, you’ll see the possible outcomes of the foil moving one way and the cutting moving the other. This is the worst-case scenario but something to keep in mind with borders.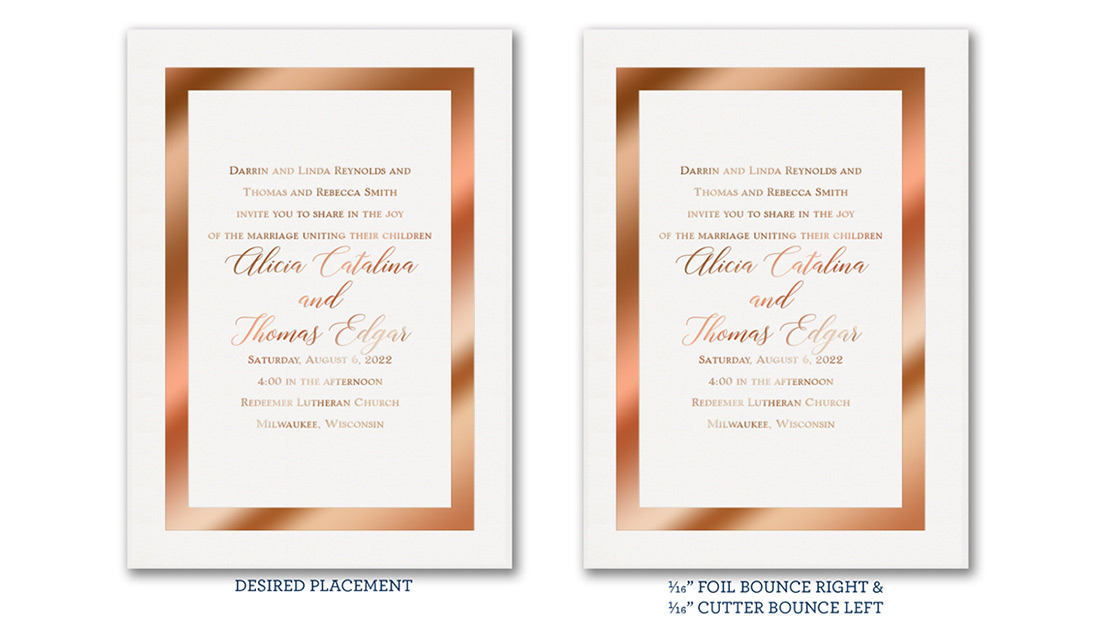
The same bounce of foil and cutter but with a thinner border with less margin.
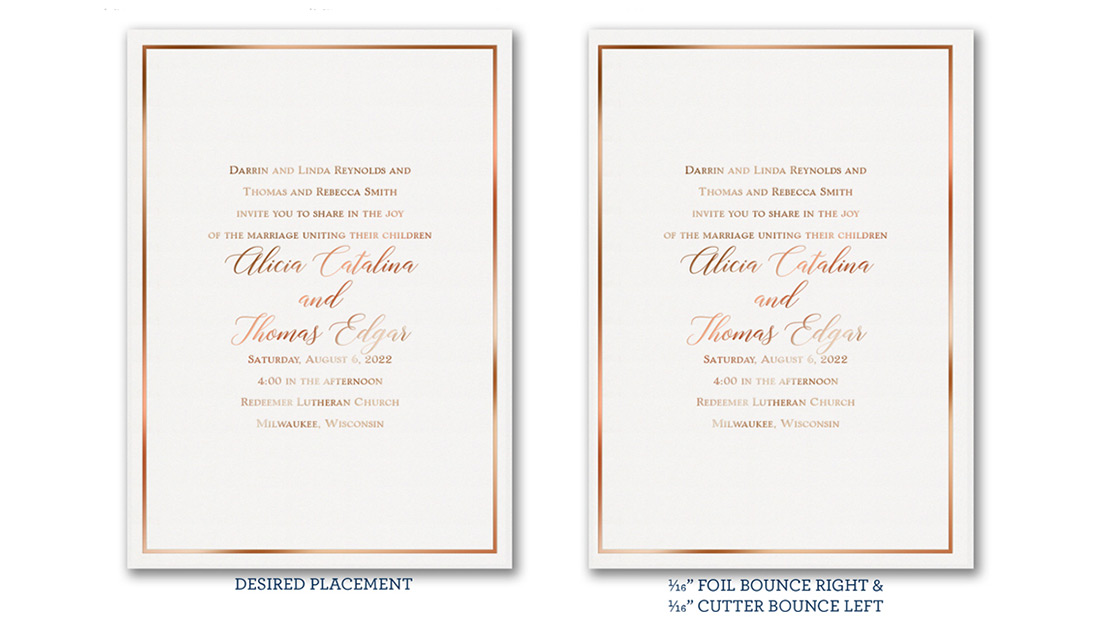
It quickly becomes apparent that the smaller the margin from the trim line, the more noticeable the stamping is. These examples show both tolerances: 1/16” for the cut and 1/16” for the stamp. If one bounces left and one right, your design will now be 1/8” total off center.
DIGITAL AND FOIL PRINTING
Again, after you have designed your piece, be sure to move each layer around the page to see what could happen if the foil goes one way and the digital goes another. These are rare cases but if you set your file up with “breathing room” for each process, the chances are greater that your piece will print beautifully.
Things to keep in mind for more successful outcomes.
We suggest avoiding tight borders within borders. This will create registration issues. Check out our post, When Does Print Registration Become a Problem. Try to leave as much buffer as possible to allow for the possible bounce from piece to piece.

Avoid running foil to the edge of a digitally printed element. We usually see this with floral and floral swag designs.
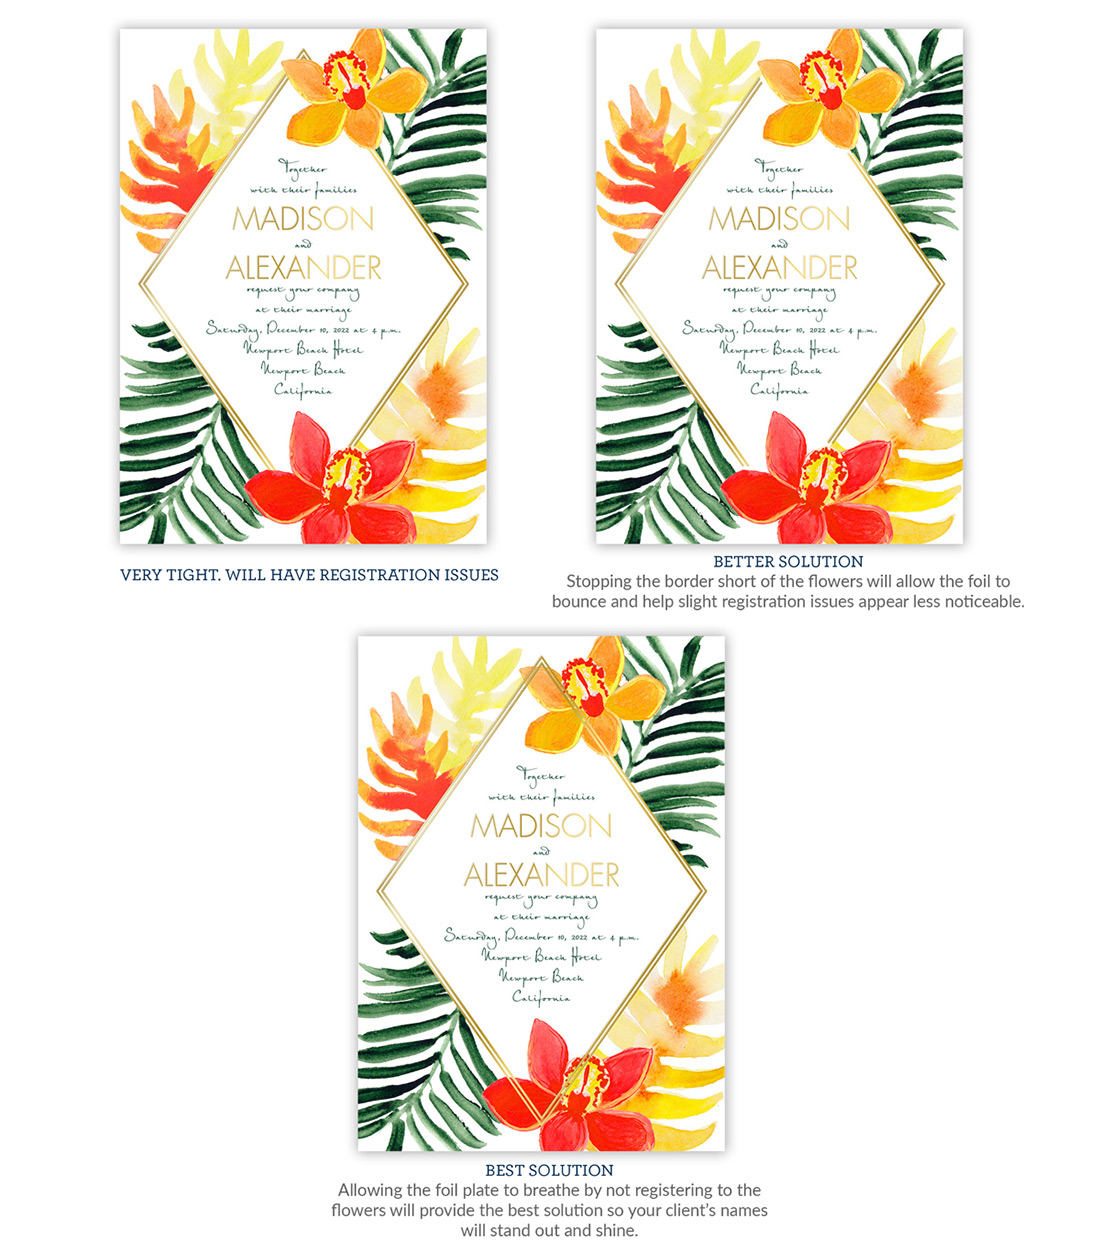
Remember, the key word when working with borders and registration is “breathe.” You and your design will benefit greatly if you keep that in mind!
We love seeing all your creative work come in and will always strive to create the best print piece possible. Keeping the “bounce” (tolerance) in mind before uploading your piece will help ensure that we can produce it quickly, more efficiently and with greater accuracy.
Leave a Reply